
The Kenmore Sewing Machine 12 Stitch Manual is your essential guide to understanding and utilizing your sewing machine’s features effectively. This comprehensive manual provides detailed instructions for operation, maintenance, and troubleshooting, ensuring optimal performance for all your sewing projects. Whether you’re a beginner or an experienced sewer, this manual offers clear guidance to help you master the machine’s capabilities, including its 12 stitch options, Ultra Stitch feature, and Sew-by-Color system. It’s designed to enhance your sewing experience and keep your machine in top condition.
1.1 Overview of the Kenmore Sewing Machine
The Kenmore Sewing Machine is a versatile, user-friendly appliance designed for a wide range of sewing projects. It features 12 built-in stitch options, including straight, zigzag, and decorative stitches, making it ideal for both basic and creative sewing tasks. The machine also boasts an Ultra Stitch feature for uniform stitching and a Sew-by-Color system for easy stitch selection. Its durable construction and advanced features ensure reliability and precision, catering to sewers of all skill levels. Regular maintenance, as outlined in the manual, ensures optimal performance and longevity.
1.2 Importance of the Manual for Operation and Maintenance
The manual is essential for understanding the Kenmore Sewing Machine’s features, operation, and maintenance. It provides step-by-step guides for threading, stitch selection, and troubleshooting common issues. Regular maintenance, such as cleaning and oiling, is outlined to ensure the machine runs smoothly. The manual also offers tips for optimizing stitch quality and extending the machine’s lifespan. By following the manual, users can maximize their sewing experience and maintain the machine in excellent condition. Detailed instructions ensure safe and efficient operation for all skill levels.
Key Features of the Kenmore 12 Stitch Sewing Machine
The Kenmore 12 Stitch Sewing Machine features 12 versatile stitch options, including straight, zigzag, and decorative stitches. It also includes the Ultra Stitch feature for uniform stitching and a Sew-by-Color system for easy stitch recommendations, making it ideal for various sewing projects.
2.1 Understanding the 12 Stitch Options
The Kenmore 12 Stitch Sewing Machine offers 12 versatile stitch options, including straight, zigzag, and decorative stitches. These stitches cater to various sewing needs, from basic repairs to intricate designs. The machine features a Sew-by-Color chart, helping users match thread colors with fabric types for professional results. Each stitch serves a specific purpose, such as reinforcing seams or creating elastic stretches, making it easy to customize projects according to fabric and design requirements.
2.2 Ultra Stitch Feature for Uniform Stitches
The Ultra Stitch feature ensures consistent and uniform stitching, enhancing the quality of your sewing projects. This advanced technology maintains precise stitch formation, regardless of fabric type or thickness. It is particularly useful for delicate fabrics, providing smooth and even results. The feature is designed to make sewing easier and more efficient, delivering professional-looking seams every time. This ensures your projects are both durable and visually appealing.
2.3 Sew-by-Color Feature and Stitch Recommendations
The Sew-by-Color feature simplifies fabric-stitch matching by categorizing stitches into color-coded groups. This intuitive system helps you quickly identify the best stitch for your fabric type, whether it’s cotton, stretch, or delicate materials. The manual provides clear recommendations, ensuring optimal results for various sewing tasks. This feature reduces guesswork and enhances seam quality, making it easier to achieve professional-looking results for both beginners and experienced sewers alike.
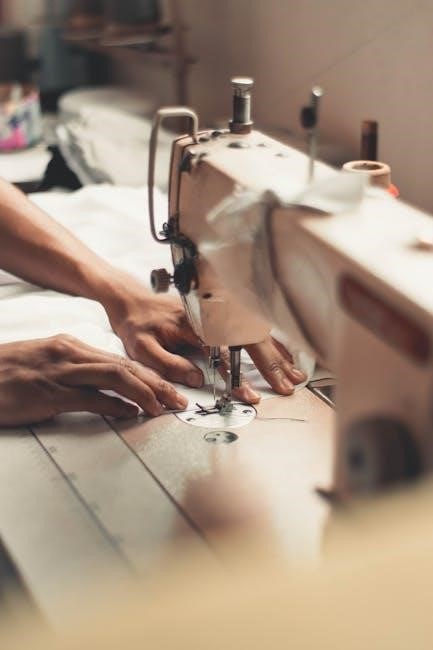
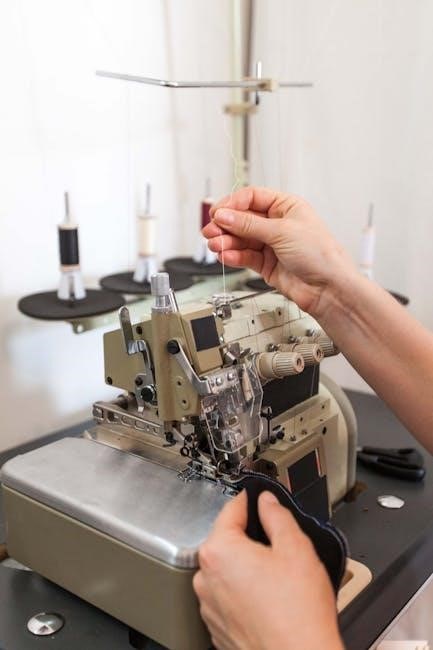
Threading and Basic Setup
Threading the Kenmore sewing machine requires careful attention to the manual’s step-by-step guide to ensure proper tension and function. The machine features a clear threading path and bobbin installation instructions to help you set it up correctly. Proper alignment of the take-up lever and tension dials is essential for smooth operation.
3.1 Step-by-Step Guide to Threading the Machine
Begin by inserting the thread into the spool pin. Guide the thread through the machine’s tension discs, ensuring it passes through the take-up lever;
Gently pull the thread to seat it properly.
Follow the manual’s illustrated path for correct routing.
If unsure, refer to the manual’s detailed diagrams for clarity.
Proper threading is crucial for smooth stitching and to prevent thread tangling or poor stitch formation.
3.2 Bobbin Winding and Installation
Start by selecting the appropriate bobbin size for your Kenmore 12 Stitch sewing machine. Place the bobbin on the bobbin winder and thread it through the machine’s tension discs and take-up lever. Wind the thread evenly, ensuring it’s not too tight or loose. Once wound, insert the bobbin into the bobbin case, located under the needle plate. Gently pull the thread to form a small loop, ensuring proper seating. Adjust the bobbin tension as needed for balanced stitches. Always use compatible thread types for top and bobbin threads to maintain stitch quality. Refer to your machine’s manual for specific instructions to ensure correct setup. Proper bobbin winding and installation are crucial for smooth sewing and to prevent issues like uneven stitches or thread breakage.
Stitch Selection and Adjustment
Mastering stitch selection and adjustment is key to achieving professional results. Choose the right stitch for your fabric type, then fine-tune length and width for optimal performance.
4.1 How to Choose the Right Stitch for Your Fabric
Selecting the right stitch for your fabric is crucial for a professional finish. Use straight stitches for woven fabrics like cotton or linen, while zigzag or stretch stitches work best for knit or elastic materials. The manual provides recommendations based on fabric type, ensuring optimal results. Always test stitches on scrap fabric to verify tension and compatibility before starting your project. This step ensures a flawless sewing experience every time.
Adjusting stitch length and width on your Kenmore sewing machine ensures proper fabric handling and desired stitch appearance. Use the stitch length control to set longer stitches for thick fabrics or shorter for delicate materials. The stitch width dial allows for narrower or wider stitches, enhancing flexibility. Always test adjustments on scrap fabric to achieve the perfect settings for your project, ensuring professional-looking results every time.
Maintenance and Care
4.2 Adjusting Stitch Length and Width
Adjusting stitch length and width on your Kenmore sewing machine ensures proper fabric handling and desired stitch appearance. Use the stitch length control to set longer stitches for thick fabrics or shorter for delicate materials. The stitch width dial allows for narrower or wider stitches, enhancing flexibility. Always test adjustments on scrap fabric to achieve the perfect settings for your project, ensuring professional-looking results every time.
5.1 Cleaning the Machine
Regular cleaning is essential for maintaining your Kenmore sewing machine’s performance. Turn off and unplug the machine before cleaning. Remove lint and debris from the bobbin area, feed dogs, and stitch plate using a small brush or vacuum cleaner. Gently wipe the exterior with a soft, dry cloth to prevent dust buildup. Avoid harsh chemicals or liquids, as they may damage the finish. Clean after each project to ensure smooth operation and extend the machine’s lifespan.
5.2 Oiling and Lubrication
Regular oiling is crucial for maintaining the smooth operation of your Kenmore sewing machine. Locate the oiling points, typically found in the bobbin area and shuttle hook. Use high-quality sewing machine oil, applying a few drops as directed in the manual. Avoid over-oiling to prevent residue buildup. Turn the handwheel gently to distribute the oil evenly. Proper lubrication ensures reduced friction, prolongs machine life, and prevents mechanical issues. Refer to the manual for specific guidance on frequency and application.
5.3 Replacing Parts and Accessories
Replacing parts and accessories on your Kenmore sewing machine is essential for maintaining performance. Regularly inspect components like presser feet, bobbins, and needles. Refer to the manual for diagrams and instructions on removing and installing new parts. Always turn off and unplug the machine before starting. Use genuine Kenmore parts to ensure compatibility and quality. Visit Sears Parts Direct or authorized dealers for authentic replacements to keep your machine running smoothly and efficiently. Proper replacement prevents damage and ensures optimal stitching results.
Troubleshooting Common Issues
Common issues like thread breaking, improper stitches, or machine jamming can be resolved by checking thread tension, cleaning the machine, and ensuring proper fabric alignment. Always refer to the manual for guidance on diagnosing and fixing problems to ensure smooth operation and extend the machine’s life.
6.1 Thread Breaking or Tangling
Thread breaking or tangling is a common issue that can disrupt your sewing workflow. It often occurs due to incorrect thread tension, improper threading, or using low-quality thread. To resolve this, check the thread path for tangles, ensure the bobbin is correctly installed, and adjust the tension settings as recommended in the manual. Regularly cleaning the machine and using the right needle size can also prevent such issues. Always refer to the troubleshooting section for detailed solutions to maintain smooth operation and extend the machine’s lifespan.
6.2 Improper Stitch Formation
Improper stitch formation can occur due to incorrect tension settings, misaligned needles, or improper thread usage. Check the stitch selector to ensure it’s set correctly for your fabric type. Verify that the bobbin is installed properly and the thread is evenly tensioned. If issues persist, refer to the manual for guidance on adjusting the stitch length and width or troubleshooting specific stitch patterns to achieve consistent results. Regular maintenance can also help prevent such problems.
Accessories for Enhanced Sewing Experience
Enhance your sewing with presser feet for various fabrics, specialized needles for different materials, and a portable case for easy transport and storage. These accessories ensure versatility and convenience, optimizing your sewing machine’s performance for any project. They are designed to make your sewing experience more efficient and enjoyable, catering to both beginners and advanced sewers.
7.1 Presser Feet for Different Fabrics
Presser feet are essential for handling various fabrics, ensuring smooth stitching and preventing fabric slipping. The Kenmore sewing machine offers specialized feet for denim, silk, and stretch fabrics, each designed to maintain stability and control. Using the right presser foot enhances sewing accuracy and makes working with delicate or heavy materials easier. The manual provides guidance on selecting the appropriate foot for your fabric type, ensuring optimal results for every project.
7.2 Needle Selection and Usage
Proper needle selection is crucial for achieving professional results. The Kenmore sewing machine supports various needles, including sharp, universal, and heavy-duty types, each designed for specific fabrics. Using the right needle ensures smooth stitching, prevents fabric damage, and maintains machine performance. Regularly changing needles after every project or when signs of wear appear is recommended. Always refer to the manual for compatibility and usage guidelines to optimize your sewing experience and fabric care.
7.3 Portable Case or Cabinet
A portable case or cabinet is an essential accessory for your Kenmore sewing machine. It provides protection during storage and transportation, keeping your machine and accessories safe. Durable and lightweight, these cases are designed for convenience, offering organized compartments for needles, threads, and other sewing supplies. Compatible with various Kenmore models, they enhance your sewing experience by ensuring everything is neatly stored and easily accessible wherever you sew.
Advanced Sewing Techniques
Master advanced sewing techniques with your Kenmore machine, exploring creative stitch combinations and fabric handling. These methods enhance your sewing skills, allowing for intricate and professional results.
8.1 Sewing with Stretch and Knit Fabrics
Sewing with stretch and knit fabrics requires the right techniques and machine settings. The Kenmore 12 Stitch Sewing Machine offers specialized stitches designed for these fabrics, ensuring elasticity and durability. Use the stretch stitches for garments like leggings or activewear, and the knit stitches for smooth, flexible seams. Adjust stitch length and width as needed, and consider using a zigzag or overlock stitch for professional finishes. Proper needle selection and tension settings are key to achieving flawless results.
8.2 Satin Stitch and Specialized Stitches
The Kenmore 12 Stitch Sewing Machine includes a satin stitch feature, ideal for decorative sewing and creating smooth, dense stitches. Use the satin stitch foot for precise control over fabric movement. Specialized stitches like the stretch stitch and overlock stitch are perfect for working with elastic or knit fabrics. Adjust stitch length and width to achieve the desired effect, ensuring professional-grade results for home decor, embroidery, or custom clothing projects.
Sewing Machine Projects
Explore beginner-friendly projects like pillowcases and tote bags, or intermediate-level ideas such as custom clothing and home decor. Use the 12 stitch options creatively for unique results.
9.1 Beginner-Friendly Projects
Start with simple projects like pillowcases or tote bags to familiarize yourself with the machine’s basic functions. Use the straight stitch for seams and the zigzag stitch for decorative edges. The Ultra Stitch feature ensures uniform results, perfect for beginners. Gradually move to zipper pouches or cloth napkins to practice working with zippers and hems. These projects build confidence and introduce you to the machine’s capabilities, making sewing enjoyable and rewarding from the start.
9.2 Intermediate-Level Sewing Ideas
Expand your skills with intermediate projects like skirts, dresses, or home decor items such as curtains or quilts. These projects allow you to practice working with zippers, buttonholes, and hems using the machine’s stitch options. Try creating tailored bags or accessories, which involve multiple layers and precise stitching. These ideas help you master stitch control and explore creative possibilities while gaining confidence in your sewing abilities with the Kenmore 12 Stitch Sewing Machine.
Where to Find Additional Resources
Access the Kenmore 12 Stitch Sewing Machine manual and additional resources on Sears Parts Direct or online forums. Download PDF manuals or explore communities for tips and troubleshooting.
10.1 Downloading the PDF Manual
The Kenmore Sewing Machine 12 Stitch Manual is readily available as a downloadable PDF from Sears Parts Direct and other trusted sources. This comprehensive guide provides detailed instructions, diagrams, and troubleshooting tips to ensure optimal use of your machine. It covers maintenance, accessories, and special features like the Ultra Stitch and Sew-by-Color system. Visit the official Sears website or authorized retailers to download the manual and enjoy seamless sewing experiences.
10.2 Online Forums and Communities
Online forums and communities are invaluable resources for Kenmore Sewing Machine users. Websites like Sears Parts Direct and dedicated sewing forums offer troubleshooting tips, maintenance advice, and creative project ideas. These platforms allow users to share experiences, ask questions, and learn from experts. Engaging with these communities can enhance your sewing skills and provide solutions to common issues, ensuring you make the most of your Kenmore Sewing Machine 12 Stitch Manual.