
Welbilt Bread Machine Instructions: A Comprehensive Guide
Welcome! This guide offers detailed instructions for your Welbilt bread machine‚ covering models like ABM600‚ ABM300‚ and ABM3100. Downloadable manuals‚ recipes‚ and troubleshooting tips are readily available in PDF format.
Welbilt has a long-standing reputation for producing reliable kitchen appliances‚ and their bread machines are no exception. These machines simplify the baking process‚ allowing you to enjoy fresh‚ homemade bread with minimal effort. Instructions and manuals are crucial for optimal performance.
Various models‚ including the ABM600‚ ABM300‚ and ABM3100‚ cater to diverse baking needs. Accessing the correct PDF manual is essential for understanding your specific machine’s features. Welbilt bread machines offer convenience and consistency‚ making them a popular choice for bakers of all skill levels. Explore the world of homemade bread!
Understanding Your Welbilt Model
Welbilt bread machines come in various models – ABM600‚ ABM300‚ ABM3100‚ and more – each with unique features. Identifying your specific model is the first step. Download the corresponding PDF manual for detailed instructions.
Familiarize yourself with the control panel‚ program settings‚ and included accessories. Understanding these components ensures proper operation and optimal baking results. Refer to your manual for specific details regarding program functions and recommended ingredient quantities. Knowing your machine’s capabilities unlocks its full potential for delicious‚ homemade bread.
Getting Started
Begin by unpacking your Welbilt bread machine and reviewing the manual. Initial setup involves cleaning and preparing the machine for its first use‚ ensuring optimal performance.
Unpacking and Initial Setup
Carefully remove your Welbilt bread machine from the packaging‚ retaining all materials for potential future transport. Inspect the unit for any visible damage incurred during shipping; report any issues immediately to the retailer. Before the first use‚ thoroughly wipe down the exterior with a damp cloth.
Remove all packing materials from inside the bread pan and kneading paddle area. Ensure the kneading paddle is securely attached. Familiarize yourself with the power cord and ensure it’s undamaged. Refer to your specific model’s manual (ABM600‚ ABM300‚ or ABM3100) for detailed diagrams and setup guidance. A clean machine is a happy machine!
Component Identification
Familiarize yourself with your Welbilt bread machine’s key components. This includes the main housing‚ the removable bread pan (often non-stick coated)‚ and the kneading paddle. Locate the control panel‚ noting the program selection buttons and display screen.
Identify the lid locking mechanism and the ingredient dispenser (if your model has one). Understand the function of the viewing window‚ allowing you to monitor baking progress. Consult your specific model’s manual – ABM600‚ ABM300‚ or ABM3100 – for detailed diagrams labeling each part. Knowing your machine ensures optimal performance.
First-Time Use: Cleaning and Preparation
Before your initial bake‚ thoroughly clean all removable parts – the bread pan and kneading paddle – with warm‚ soapy water. Wipe down the machine’s interior and exterior with a damp cloth; Ensure all components are completely dry before reassembling.
A brief “test run” without ingredients is recommended. Select a basic program and let it run briefly to burn off any manufacturing residue. Refer to your Welbilt ABM600‚ ABM300‚ or ABM3100 manual for specific preparation guidelines. Proper cleaning guarantees fresh‚ flavorful loaves.
Basic Bread Making
Start with accurate ingredient measurements and proper order – liquids first‚ then dry‚ and finally yeast. Select the appropriate program on your Welbilt machine!
Ingredient Guidelines and Ratios
Achieving perfect bread relies on precise ingredient ratios. Generally‚ a standard recipe utilizes approximately 3 to 3 ¼ cups of flour‚ 1 ¼ to 1 ½ cups of liquid (water‚ milk)‚ 2 to 3 tablespoons of sugar‚ 1 ½ to 2 teaspoons of salt‚ and 2 ¼ teaspoons of active dry yeast.
However‚ flour type significantly impacts liquid absorption; whole wheat requires more liquid than white flour. Always refer to your Welbilt model’s manual for specific recommendations‚ as variations exist. Experimentation is key to finding the ideal balance for your preferred texture and taste!
Adding Ingredients in the Correct Order
For optimal results with your Welbilt bread machine‚ follow a specific ingredient layering sequence. Begin by adding liquids – water‚ milk‚ or oil – to the bread pan. Next‚ incorporate dry ingredients like flour‚ sugar‚ and salt. Crucially‚ create a small well in the center of the dry ingredients and add the yeast.
This prevents premature yeast activation from liquid contact. Finally‚ add any optional ingredients like seeds or nuts. Adhering to this order ensures proper mixing and consistent bread texture‚ as detailed in your machine’s manual.
Selecting the Appropriate Program
Your Welbilt bread machine features various pre-programmed settings for diverse baking needs. Carefully review the control panel and select the program that best matches your recipe – basic‚ whole wheat‚ French‚ or sweet bread are common options.
For specialized baking‚ utilize the dough or jam programs. Refer to your machine’s manual for specific program durations and recommended ingredient types. Choosing the correct program ensures optimal kneading‚ rising‚ and baking times‚ resulting in perfectly baked bread every time.

Advanced Bread Making Techniques
Explore diverse flour types‚ add fruits‚ nuts‚ or seeds‚ and adjust bake times and crust colors for customized bread creations with your Welbilt machine!
Using Different Flour Types
Experimenting with flour significantly impacts your bread’s texture and flavor. Welbilt machines accommodate various types‚ including all-purpose‚ bread flour‚ whole wheat‚ rye‚ and even gluten-free blends. Bread flour‚ with its higher protein content‚ yields a chewier loaf.
Whole wheat adds a nutty flavor and denser texture; consider blending it with bread flour for optimal results. Rye flour contributes a distinctive taste‚ best used in smaller proportions. When using alternative flours‚ refer to your machine’s manual for adjustments to liquid ratios and program selection. Always ensure proper hydration for successful baking!
Adding Fruits‚ Nuts‚ and Seeds
Enhance your loaves with delightful additions! Welbilt bread machines allow for incorporating fruits (dried or candied)‚ nuts‚ and seeds. Typically‚ add these ingredients during the second kneading cycle‚ signaled by an audible beep.
This prevents them from being crushed during the initial mixing. Ensure ingredients are chopped into smaller pieces for even distribution. Avoid overloading the machine; a general guideline is to limit additions to approximately 1-1.5 cups per loaf. Consult your manual for specific recommendations and adjustments to baking times if needed.
Adjusting Bake Times and Crust Colors
Welbilt bread machines offer customization! Adjust bake times to achieve desired doneness‚ especially when experimenting with recipes or high-altitude baking. Monitor the loaf’s internal temperature (around 200-210°F) for accuracy.
Crust color settings – typically light‚ medium‚ and dark – allow you to personalize your bread’s appearance. Remember that darker crusts may require slightly longer baking times. Refer to your model’s manual for specific time adjustments and crust color guidelines. Experiment to find your perfect settings!
Specific Welbilt Model Instructions
Explore dedicated guides for Welbilt models ABM600‚ ABM300/ABM350‚ and ABM3100. Download specific manuals in PDF format for tailored instructions and optimal baking results.
Welbilt ABM600 Instructions
The Welbilt ABM600 bread machine offers versatile baking options. Download the dedicated user manual in PDF format for comprehensive instructions. Begin by ensuring proper setup and ingredient order‚ crucial for successful loaves. Utilize the various pre-programmed settings – basic‚ whole wheat‚ French‚ and dough – adjusting bake times as needed.
Pay close attention to ingredient ratios; accurate measurements are key. The manual details specific program durations and crust control options. Troubleshooting sections address common issues like rising problems or dense textures. Remember to clean the machine thoroughly after each use‚ following the manual’s guidance for optimal performance and longevity.
Welbilt ABM300/ABM350 Instructions
For Welbilt ABM300 and ABM350 models‚ access the free PDF manual online for detailed instructions. These machines feature similar functionalities‚ with pre-set programs for white bread‚ whole wheat‚ and dough. Ensure ingredients are added in the correct sequence‚ as outlined in the manual‚ for optimal results.
Pay attention to the recommended ingredient quantities and baking times. The manual provides guidance on adjusting settings for different flour types and desired crust colors. Troubleshooting tips address common issues like under-proofing or overly dense bread. Regular cleaning‚ as detailed in the manual‚ is essential for maintaining performance.
Welbilt ABM3100 Instructions
The Welbilt ABM3100 bread maker’s manual‚ available for free download as a PDF‚ provides comprehensive instructions. This model offers a variety of programs‚ including basic‚ whole wheat‚ French‚ and dough. Carefully review the manual for specific ingredient ratios and the correct order of addition.
Utilize the delay timer function for freshly baked bread in the morning. The manual details how to adjust bake times and crust settings to your preference. Troubleshooting sections address common concerns‚ such as bread not rising or a too-dark crust. Consistent cleaning‚ per the manual‚ ensures longevity.
Troubleshooting Common Issues
Common problems like bread not rising or being too dense are addressed in Welbilt manuals. PDF guides offer solutions for crust color and other baking concerns.
Bread Not Rising
If your dough isn’t rising‚ first verify the yeast is fresh and properly activated. Welbilt manuals emphasize using the correct amount and type of yeast for each recipe. Ensure ingredients are added in the precise order specified‚ as this impacts activation.
Check the room temperature; it should be warm enough for yeast activity. Also‚ confirm the selected program is appropriate for the bread type. PDF guides detail program settings. Finally‚ examine the kneading paddle to ensure it’s properly attached and functioning‚ as inadequate kneading hinders rise.
Bread Too Dense
Dense bread often indicates insufficient yeast or improper hydration. Welbilt bread machine manuals stress accurate measurements. Verify the yeast hasn’t expired and was activated correctly with warm water and sugar. Too much flour‚ or not enough liquid‚ also causes density.
Consult your PDF manual for correct ingredient ratios. Ensure the kneading paddle is functioning properly for adequate gluten development. Some models have a “dough” setting for initial kneading before baking‚ improving texture. Avoid interrupting the cycle prematurely.
Crust Too Dark or Light
Crust color adjustments are crucial. Welbilt bread machine instructions highlight crust control settings – light‚ medium‚ and dark. A dark crust suggests excessive sugar or a prolonged baking cycle. Conversely‚ a pale crust indicates insufficient baking time or low sugar content.
Refer to your manual for specific program settings. Some models allow manual bake time adjustments. Ensure the heating element is clean for even browning. Using different flour types can also impact crust color; whole wheat often results in a darker crust.

Maintenance and Care
Regular cleaning and proper storage extend your Welbilt’s lifespan. Instructions detail paddle replacement and emphasize keeping the machine free from dough residue for optimal performance.
Cleaning Your Welbilt Bread Machine
Thorough cleaning is vital for maintaining your Welbilt bread machine. Always unplug the machine before cleaning. Remove the kneading paddle and wash it with warm‚ soapy water. Wipe the interior of the bread pan with a damp cloth‚ avoiding abrasive cleaners. The exterior can be cleaned with a slightly damp cloth as well.
Ensure all components are completely dry before reassembling. Regularly check for and remove any accumulated crumbs or dough residue. Refer to your model’s instruction manual for specific cleaning recommendations‚ as some parts may not be dishwasher safe. Proper cleaning prevents odors and ensures consistent baking results.
Storage Instructions
Proper storage extends the life of your Welbilt bread machine. Before storing‚ ensure the machine is completely clean and dry‚ preventing mold or mildew growth. Store in a cool‚ dry place‚ away from direct sunlight and extreme temperatures. Avoid storing near water sources or in damp environments.
Keep the original packaging if possible‚ providing protection during storage. If the kneading paddle is removed‚ store it safely within the bread pan to prevent loss. Regularly check the storage area for pests. Consult your instruction manual for model-specific storage advice.
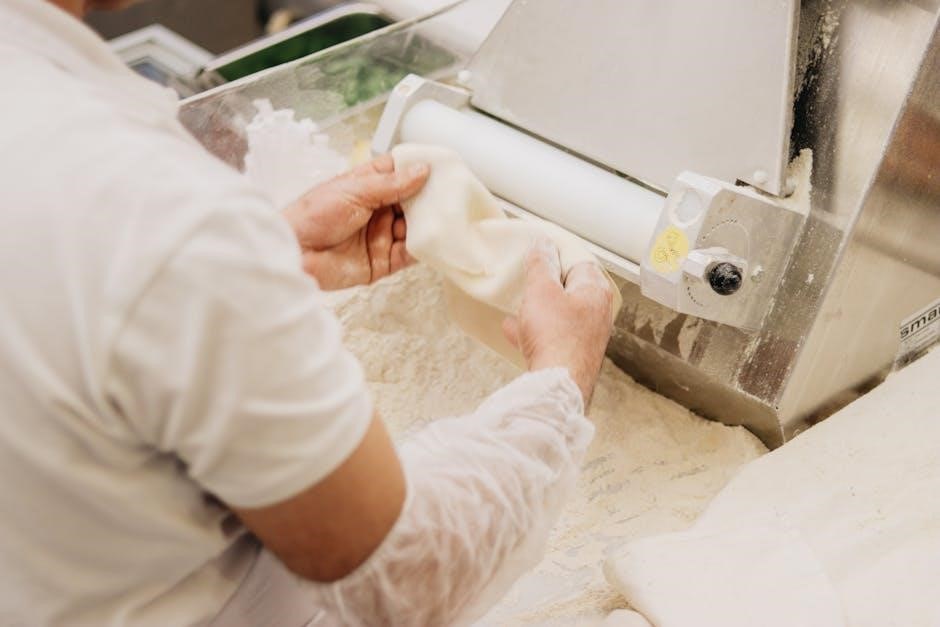
Replacing the Kneading Paddle
To replace the kneading paddle‚ first‚ ensure the bread machine is unplugged and cooled. Locate the paddle shaft within the bread pan. Gently pull the old paddle straight up; it may require a slight twisting motion. Inspect the new paddle for any damage before installation.
Align the new paddle with the shaft and push it firmly into place until it clicks or feels secure. Incorrect installation can damage the machine or affect baking results. Refer to your instruction manual for specific diagrams and guidance related to your Welbilt model.

Recipes for Your Welbilt Bread Machine
Explore delicious recipes – basic white‚ whole wheat‚ and sweet breads – designed specifically for your Welbilt machine‚ enhancing your baking experience!
Basic White Bread Recipe
Yields: 1 loaf. Prep time: 10 minutes. Cook time: 3 hours 30 minutes (including rise time).
Ingredients: 1 ¼ cups warm water‚ 3 ¼ cups bread flour‚ 2 tablespoons sugar‚ 1 ½ teaspoons salt‚ 2 ¼ teaspoons active dry yeast‚ 2 tablespoons softened butter.
Instructions: Add ingredients to the bread machine pan in the order listed. Select the ‘Basic’ program and a 1.5-pound loaf size. Press start. Once the cycle completes‚ carefully remove the loaf and let it cool completely on a wire rack before slicing and enjoying your freshly baked bread!
Whole Wheat Bread Recipe
Yields: 1 loaf. Prep time: 15 minutes. Cook time: 3 hours 45 minutes (including rise time).
Ingredients: 1 ¼ cups warm water‚ 2 cups whole wheat flour‚ 1 ¼ cups bread flour‚ 2 tablespoons honey‚ 1 ½ teaspoons salt‚ 2 ¼ teaspoons active dry yeast‚ 2 tablespoons olive oil.
Instructions: Combine ingredients in the bread machine pan‚ ensuring yeast doesn’t touch liquid initially. Select the ‘Whole Wheat’ program and a 1.5-pound loaf size. Press start. Upon cycle completion‚ remove the loaf and cool on a rack. Enjoy a nutritious and flavorful whole wheat bread!
Sweet Bread Recipe
Yield: 1 loaf. Prep time: 20 minutes. Cook time: 3 hours 30 minutes (including rise time).
Ingredients: 1 cup warm milk‚ ¼ cup sugar‚ ¼ cup butter (softened)‚ 1 egg‚ 3 cups bread flour‚ 1 ½ teaspoons salt‚ 2 ¼ teaspoons active dry yeast‚ ¼ cup raisins (optional).
Instructions: Add ingredients to the bread machine pan in the order recommended by your Welbilt model’s manual. Select the ‘Sweet’ or ‘Dessert’ program‚ and a 1.5-pound loaf size. Press start. Once baked‚ cool completely before slicing and enjoying this delightful sweet bread!

Exploring Additional Features
Discover the delay timer for fresh bread anytime‚ the keep warm function‚ and specialized jam and dough programs on your Welbilt machine!
Delay Timer Function
Utilize the convenient delay timer to schedule bread baking up to 13 hours in advance! This feature allows you to enjoy freshly baked bread precisely when you desire. First‚ add all ingredients into the bread machine pan; Next‚ select the desired program and crust color. Then‚ press the ‘Delay Timer’ button and set the desired delay time using the hour and minute buttons.
Ensure that perishable ingredients‚ like milk or eggs‚ are kept cool during the delay period – consider using a refrigerated delay option if available on your model. Remember to account for the total baking time when setting the delay‚ ensuring the bread finishes baking at your preferred time.
Keep Warm Function
The Keep Warm function is incredibly useful for maintaining your freshly baked bread at an optimal serving temperature! Once the baking cycle completes‚ the machine automatically switches to the ‘Keep Warm’ mode‚ typically lasting for up to one hour. This prevents the bread from becoming stale or cold if you’re not immediately ready to enjoy it.
To disable the ‘Keep Warm’ function‚ simply press the ‘Start/Stop’ button. Be mindful that prolonged use of the ‘Keep Warm’ function can slightly dry out the crust. For best results‚ remove the bread from the pan promptly after baking to prevent condensation.
Jam and Dough Programs
Welbilt bread machines often include versatile ‘Jam’ and ‘Dough’ programs‚ expanding their functionality beyond bread baking! The ‘Jam’ program allows you to create delicious homemade preserves using fresh fruits and sugar‚ following specific recipe guidelines for ingredient ratios and cooking times. The ‘Dough’ program is perfect for preparing yeast doughs for pizzas‚ pastries‚ or rolls.
Simply add ingredients‚ select the appropriate program‚ and let the machine handle the kneading process. Remember to remove the dough after kneading and proceed with shaping and baking in a conventional oven.

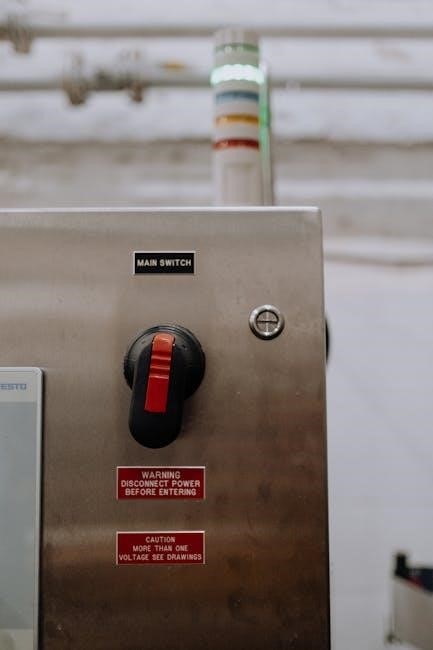
Safety Precautions
Always prioritize electrical and operating safety when using your Welbilt bread machine. Prevent damage by following the manual’s guidelines for proper usage and care.
Electrical Safety
Ensure your outlet voltage matches the machine’s requirements to prevent electrical shock or fire hazards. Never immerse the bread machine‚ cord‚ or plug in water or other liquids. Always unplug the appliance when not in use‚ before cleaning‚ or if a malfunction occurs. Do not operate the machine with a damaged cord or plug; seek professional repair. Avoid using extension cords if possible‚ and if necessary‚ use a heavy-duty cord rated for the appliance’s wattage. Inspect the cord regularly for damage. Keep the appliance away from heat sources.
Operating Safety
Always place the bread machine on a stable‚ heat-resistant surface away from flammable materials. Never touch the hot surfaces‚ such as the baking pan or heating element‚ during or immediately after operation. Use oven mitts when handling the hot pan. Do not open the lid during the baking cycle unless absolutely necessary‚ as this can affect the bread’s rise. Ensure the kneading paddle is securely attached before starting. Avoid overfilling the baking pan‚ as this can cause overflow. Supervise children when the machine is in use.
Preventing Damage to the Machine
Avoid using abrasive cleaners or scouring pads‚ as they can scratch the non-stick coating of the baking pan. Do not immerse the main unit in water or any other liquid. Ensure the kneading paddle is properly seated before each use to prevent damage to the motor. Unplug the machine when not in use and before cleaning. Do not attempt to repair the machine yourself; contact qualified service personnel. Keep the ventilation openings clear of obstructions. Handle the baking pan with care to avoid dents or warping.